Posts tagged illustration
The Custom Screen Printing Process, Part 5 - Printing!

You've hung in there with us for 4 installments, now we're ready to get to the fun part - Printing! But before we can commit to printing our image on a production garment, we need to pull "proofs", or test prints, to make sure that everything is set correctly.  There may be minor imperfections in the registration at this stage, for example, that need to be adjusted before production can begin.   Each color is printed in sequence, starting with the lightest - often, a white underbase.  At Snarxy, we hand-print our garments on a manual printing press, which means that we use a screen printing squeegee to manually push ink through the screen and onto the garment.  After any corrections or adjustments are made, and the registration marks in the screens are covered, we are ready to for the fun part.  The production run.  The Print Train.  A garment is loaded onto the press, and production begins!

In manual screen printing, more than in any other form of printmaking, the printer's technique and physicality play a bigger role in the outcome of the final print.  This is because the person pulling the squeegee is effectively becoming the printing press.  A set of proper techniques for flooding the screen (even distributing the ink that will be pushed through) and  pulling the squeegee help to ensure a high quality print - one that is crisp, sharp, and smooth.  Before the next color can be printed, the garment must be "flashed."  Textile ink doesn't air-dry - it must be heat cured.  Flashing the garment for a few seconds partially cures the ink so it isn't still wet when the next color is printed.  This preserves the integrity of the image.  The process is repeated for each color, until complete image has been printed.  The garment is then removed from the press and put through the conveyor dryer, which is exactly what it sounds like - a conveyor belt that heats the ink to its final curing temperature, permanently setting it in the garment.  And just like that, you've completed a screen print!

The Custom Screen Printing Process, Part 4: Registration & Press Setup

We are almost ready to print!  In part four of our series, we'll be taking the screens that we just finished making in our last installment, and setting them up on the press for our production run.    By this stage, the screens should be totally dry - you won't want any residual moisture lingering around.  We give the screens a final visual inspection by holding them up to the light and looking for any imperfections in the image, as well as any pinholes or blemishes in the emulsion that might cause problems during printing.  Any pinholes are blocked with more emulsion or tape depending on their severity, and the edges of the screen along the frame are sealed with tape to prevent ink leaking out the sides.

screens canvas.jpg


 Now, we're ready to load the screen onto the press.  Each screen is clamped into one of the printing heads on the press.  Using the registration marks that we put into the image, each screen is carefully lined up with, or "registered," with each other. 

Off-contact is checked and any necessary adjustments are made -this helps to prevent too much or too little ink from passing through the screen during the print.    Then, each of the screens is loaded with the proper color of ink.  Now, the press is set up - and we are ready to pull the first "proof," or test-print.    Tune in next time!

The Custom Screen Printing Process, Part 3: Making & Exposing Screens

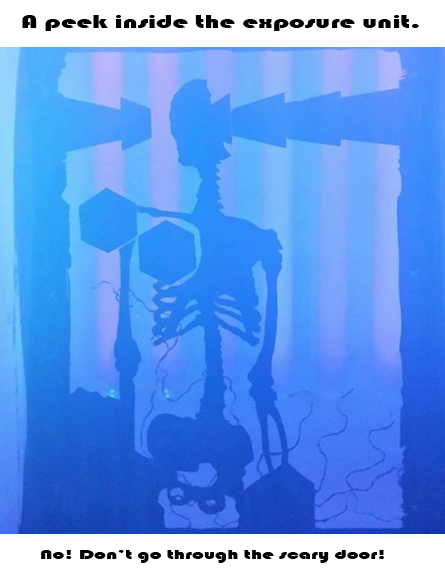
Screen printing is basically a stencil-based form of printmaking.   In part 3 of this series, we are looking at how the screens are made and turned into a stencil.  The screen is a metal frame with an ultra-fine mesh stretched  drum-tight affixed to it.  The screen is coated with a light-sensitive photo-emulsion, which basically turns it into a giant piece of photographic film, and left in the dark to dry.  Once the emulsion is thoroughly dry, it is ready to have an image exposed into it.  This is where the films come in.  The film is laid on the screen, pressed right against the emulsion.  The screen with film is then exposed to ultraviolet light.  The film acts as a light blocker; the parts of the emulsion that are exposed to the UV light undergo a chemical change, hardening and solidifying.  The parts of the emulsion that are underneath the image on the film, however, will not be exposed to UV light, and therefore will not undergo the same chemical change;  they will remain soft and water-soluble.

exposure.PNG


At the end of the exposure, a faint ghost image will be visible in the emulsion.  At this point, the exposure is complete and the image must be developed, or washed out.  The screen is blasted thoroughly on both sides with water from a pressure washer, until all of the undeveloped emulsion is completely washed away.  What is left is a stencil that will be used to print the final image on a shirt.  Now, textile ink will only pass through the areas of exposed mesh, making the screen an effective stencil for printing.  Repeat this process for each of the colors or screens that are part of the design, and then we're almost ready for the fun part, printing!

screens canvas.jpg
The Custom Screen Printing Process, Part 2: Digital Art

In the second part of our series on the screen printing process, we're going to take a look at how the artwork is turned into a digital vector image that is suitable for producing the films needed to create the screens that will be used to print.  How does a doodle on a bar napkin end up as a slick graphic on a t-shirt?

wip-blog.png

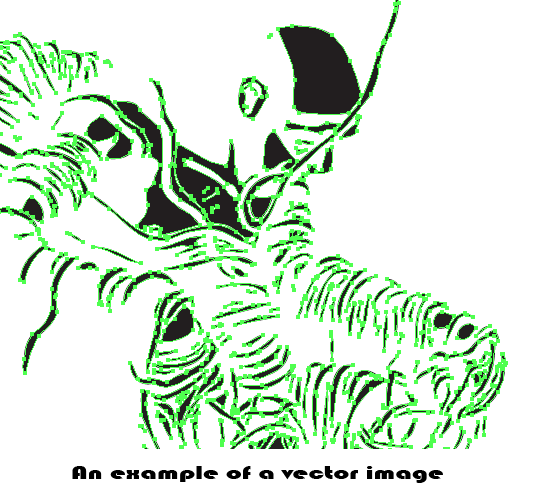
The image is either scanned or photographed to bring it into a graphics program, in this case Adobe Illustrator.  At this point, the digital image is not suitable for use in screen printing, because it is still a Raster image.  Illustrator is used to trace the image and recreate it in a Vector format.  Vectors are inherently different than rasters.  A raster image is built from millions of tiny pixels, each of which has a numerical value assigned to it which the computer interprets as a color.  A vector image on the other hand, rather than being essentially a table of coordinates and colors, is composed of mathematical equations that describe different curved lines.  Therefore, a vector image can be scaled to any size without losing its resolution, because the equations don't change.  That's all techno-babble though.  Basically, at this point we want to use vectors because we can scale them to any size, easily change colors, as well as separate the colors onto different layers more easily (this is important in the next step).    A vector graphic can also be used as a cutting path for a vinyl cutter, which is handy for making decals or heat transfers!

vector example.PNG


Once the drawing is vectorized, the elements of each color are placed on separate layers - so, all the parts of the image that will be printed with white ink are on one layer, all the red is on a second layer, and so forth.   There is also a layer with "registration marks," which are used later to make sure all the colors are lined up properly with each other.   This is because our goal is to make a screen for each color in the design.  The objects on each layer are converted to 100% key black, and printed onto transparent films.  These films are the film positives that are used in the next step, making screens! Tune in next week!

The Custom Screen Printing Process, Part 1: Drawing

In the first part of this series, we're going to look at where the screen printing process begins - with drawing.  It all starts with a drawing.  Everything.  There is nothing in this world that didn't begin as a drawing.  Screenprinting custom t-shirts is no different.  Ok.  Maybe it actually starts with an idea.  But drawing is what gives an idea form, guides its creation. 

Drawing is my primary discipline.  It's a subject that I will expound on ad infinitum if I had the space, but we're here today to talk about drawing as it relates to the screen printing process, so I'll try to keep it brief. 

The idea for this image came from discussions between my brother and I.  Eventually, the discussion led to him describing an image to me: "a guy sitting a chair watching TV in the dark, but he's all tangled up in these cables like they've grown over him, one of them is a feeding tube."  The security camera was my idea, but that came later. 

With the idea and a direction to go in, I started sketching.  Eventually I wound up with the following drawing in my sketchbook:

cableguysketch.jpg

Now ordinarily I tend to work out an image traditionally, but at this point in time  I happened to be creatively stuck, so I went ahead and imported my sketch to Adobe Photoshop, and exported it so I could continue to draw on my Kindle Tablet with the Autodesk Sketchbook App (which, by the way, is amazing).  With Autodesk I was able to intuitively redraw and rework parts of the image until I was satisfied with the design and composition, as well as try out different color schemes with relative ease until I was satisfied with the design.  The finished drawing looked like this:

cable guy 4 color night gamut.jpg

In part 2 of this series we'll take a look at what happens to the artwork once it's done - how is processed for screenprinting?  Tune in next week.